WordPress menus make it very easy to add navigation to your WordPress pages. You can have multiple menus on the same page. Although images for WordPress menus are not very SEO friendly and make it difficult to edit menu items, there are times when you would like to add background images to the menu. If you wish to use a specific font which is not rendered by the web, images are the best option.
To create a menu in wordpress, use . For more information, see the WordPress codex on menus
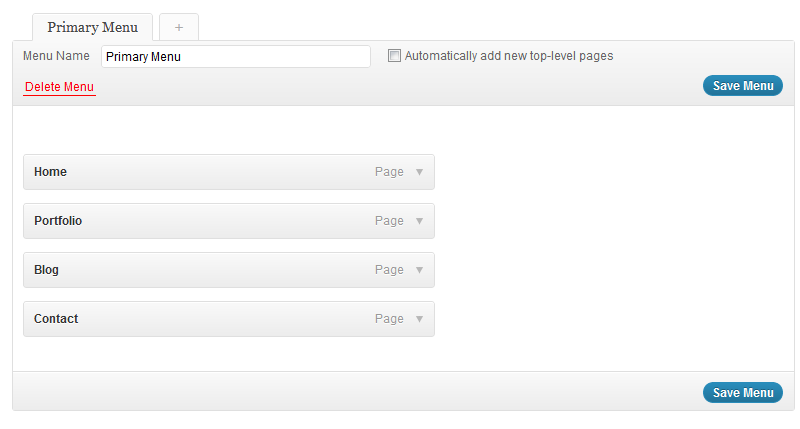
Once you register the menus, you can see them on the wp-admin panel under Appearance->menus. Then add the pages you want on your navigation.
Add the menu to your theme.
Add the css styles for the menu.
#nav{

margin-left:440px;

height:auto;

overflow:hidden;

margin-top:35px;

}
#nav li{
list-style-type:none;
float:left;
}
#nav li a{
color:#38830a;
text-decoration:none;
display:block;
font-family:Verdana, Geneva, sans-serif;
font-size:18px;
}
#nav li a:hover{
color:#600;
text-decoration:none;
}
#nav li.current-menu-item a{
color:#600;
text-decoration:none;
}
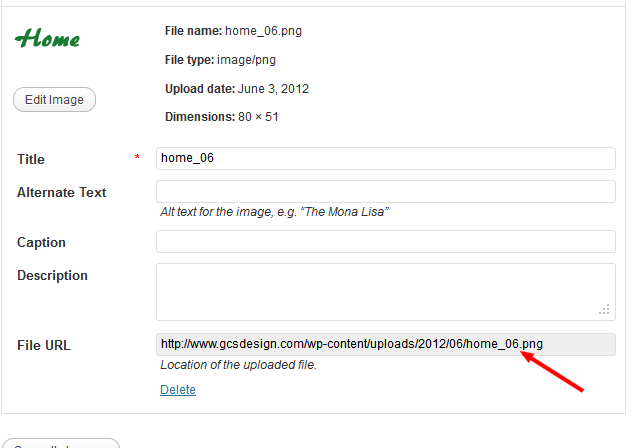
Now, upload all the background images you would be using for the menu using media->add new from the WordPress admin panel. Each menu item should have its own background image. Open up the first image in the media gallery and copy the image url.
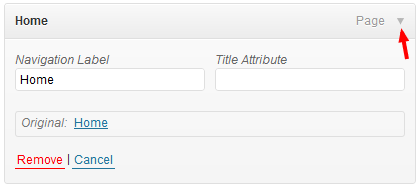
Come back to appearance->menus and click on the down arrow on the right of the first menu item. This will allow you to edit the navigation label and the Title Attribute. The navigation label is the one that will show up on your page. You need to add an image tag in the navigation label instead of the menu title.
Add this image tag in the Navigation Label. Paste the image url in the src attribute and the name of the page in the alt attribute and save it. When you refresh your site, you should see the image showing up in the place of the first menu item.
Add the rest of the images in a similar manner.


